How to Take a Screenshot on a Mac
Use keyboard shortcuts to take a screenshot on MacOS
Sep 17, 2024 | Share
Equipment Guides, How-To
Taking a screenshot on a Mac uses different keys than you might be familiar with on Windows, but it’s just as easy. There are even several variations that can save you a few steps in getting the screenshot you want.
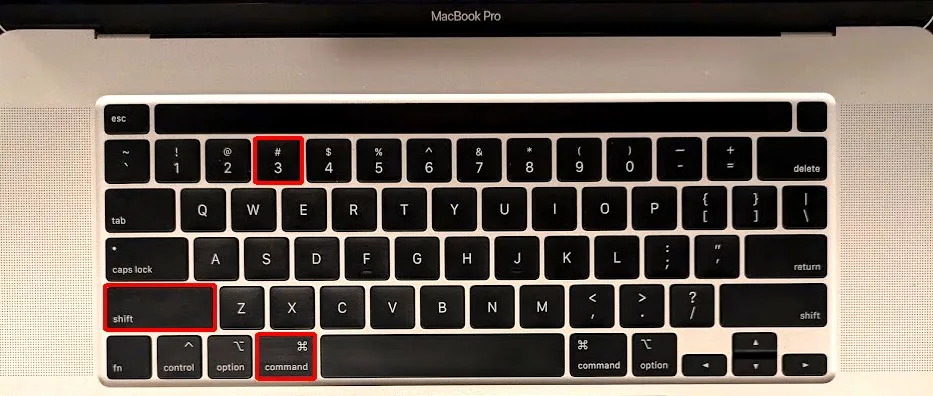
How to take a basic screenshot

Step 1: Press and hold Shift + Command + 3.
Step 2: A thumbnail of the screenshot will appear in the corner of your screen. You can click the thumbnail to edit the screenshot. Otherwise, your computer will save the screenshot as a PNG file to your desktop.
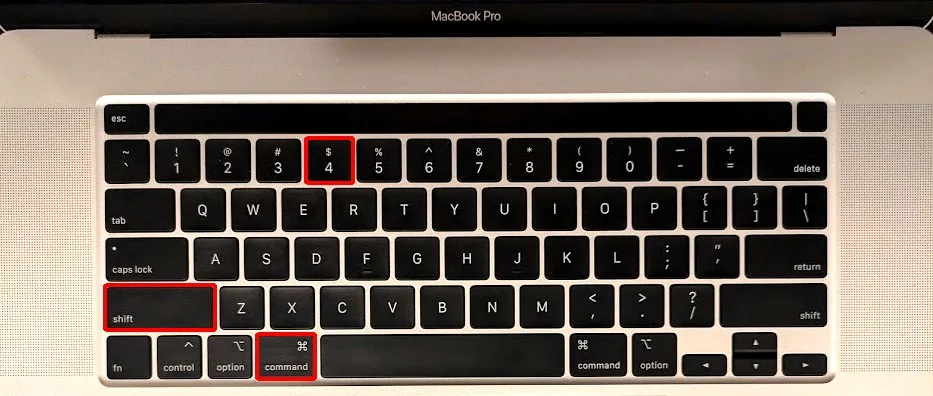
How to take a screenshot of part of the screen

Step 1: Press and hold Shift + Command + 4.
Step 2: Click and drag your cursor (which should look like a crosshair) to select the portion of the screen you want to capture. You can press the Escape key (Esc) to cancel.
Step 3: Release your mouse button to take the screenshot.
Step 4: A thumbnail of the screenshot will appear in the corner of your screen. You can click the thumbnail to edit the screenshot. Otherwise, your computer will save the screenshot as a PNG file to your desktop.
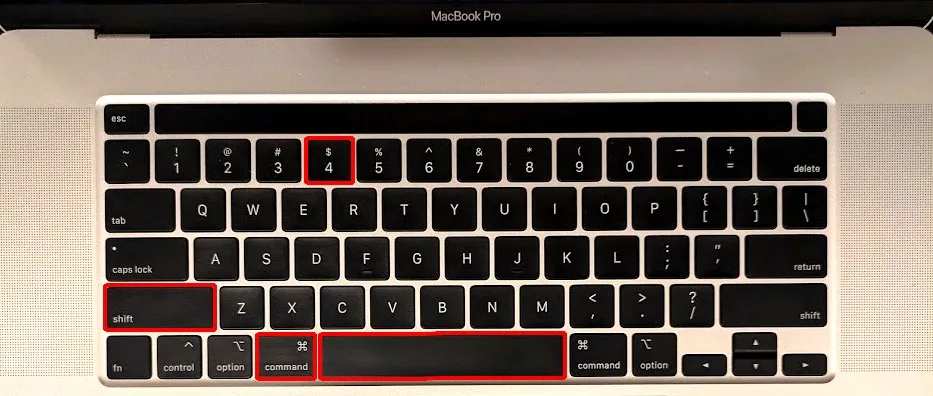
How to take a screenshot of a window or menu

Step 1: Open the window or menu that you want to capture.
Step 2: Press and hold Shift + Command + 4 + Space bar.
Step 3: Click on the window or menu you want to capture. (Your cursor should look like a camera.) You can press the Escape key (Esc) to cancel.
Step 4: A thumbnail of the screenshot will appear in the corner of your screen. You can click the thumbnail to edit the screenshot. Otherwise, your computer will save the screenshot as a PNG file to your desktop.
Pro Tip:
By default, screenshots of a window will include the shadow around the bottom in the image. If you don’t want the shadow to be captured, you can hold the Option key when you click on the window in step three to exclude the shadow from the screenshot.
How to edit screenshots
MacOS gives you a couple of convenient options for taking screenshots in the exact way you want, but you can also just take a screenshot and then crop it down to what you need. You can do this in the Preview app or in any photo editing app.
You can also use these apps to convert your screenshot to another format, like JPG, if a PNG file doesn’t work for you.
Author - Peter Christiansen
Peter Christiansen writes about telecom policy, communications infrastructure, satellite internet, and rural connectivity for HighSpeedInternet.com. Peter holds a PhD in communication from the University of Utah and has been working in tech for over 15 years as a computer programmer, game developer, filmmaker, and writer. His writing has been praised by outlets like Wired, Digital Humanities Now, and the New Statesman.
Editor - Jessica Brooksby
Jessica loves bringing her passion for the written word and her love of tech into one space at HighSpeedInternet.com. She works with the team’s writers to revise strong, user-focused content so every reader can find the tech that works for them. Jessica has a bachelor’s degree in English from Utah Valley University and seven years of creative and editorial experience. Outside of work, she spends her time gaming, reading, painting, and buying an excessive amount of Legend of Zelda merchandise.


