BenQ RD280U Programming Monitor Review
BenQ's monitor is great for anyone wanting razor-sharp text
Aug 30, 2024 | Share
Equipment Guides, Monitor Reviews
*Amazon.com price (as of 8/26/24 17:35 MST). Read full disclaimer.
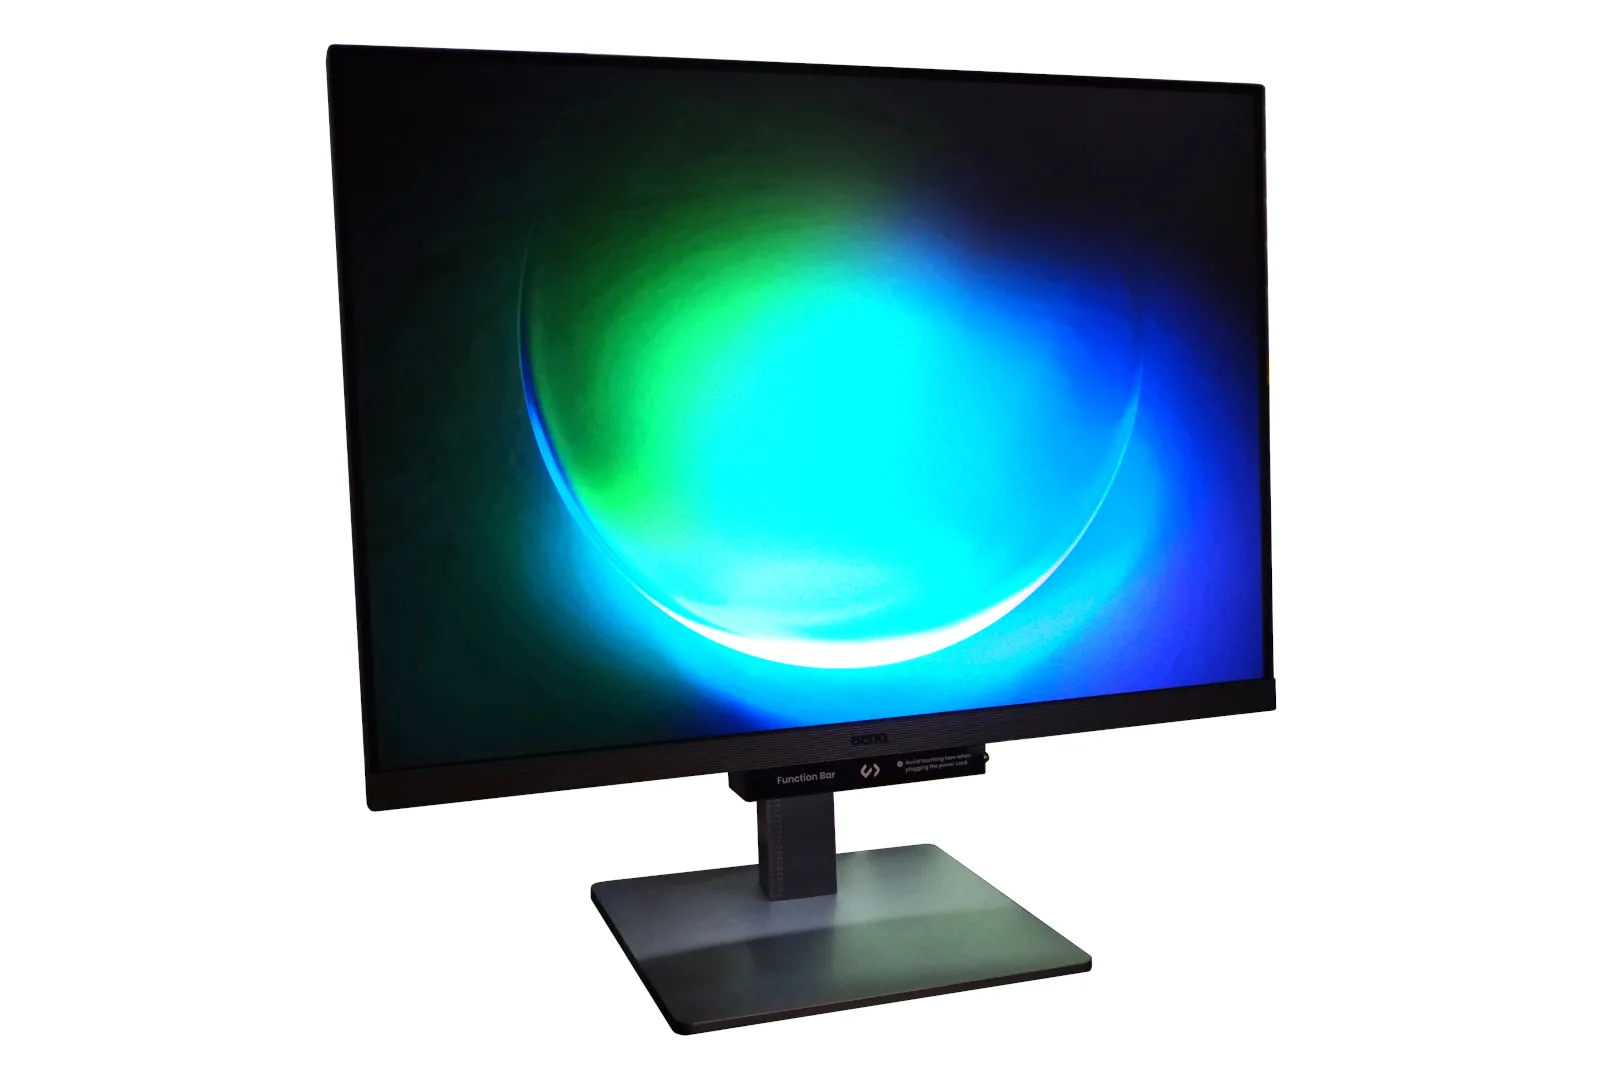
BenQ pitches the RD280U as a monitor for programmers, but it’s great for anyone to use. Kevin Parrish | HighSpeedInternet.com
Is the RD280U right for you?
The BenQ RD280U is billed as a monitor built for programmers, but it’s an excellent pick for anyone who is willing to spend the money. I loved this monitor’s extra features and performance:
- Sharp displays and crips fonts
- Tools to reduce eye fatigue, like built-in bias lighting
- Connections for two separate devices
PC gamers may want to look elsewhere, however, given there are no built-in tools or support for super-high refresh rates.
 Pros:
Pros:
- Built-in bias lighting
- Touch controller
- Multiple video inputs
 Cons:
Cons:
- Cumbersome setup
- Quirky desktop software
- Awkward button placement
In this review: Standout features | Scoring breakdown | Our verdict | FAQ | Methodology
In this review:
RD280U standout features
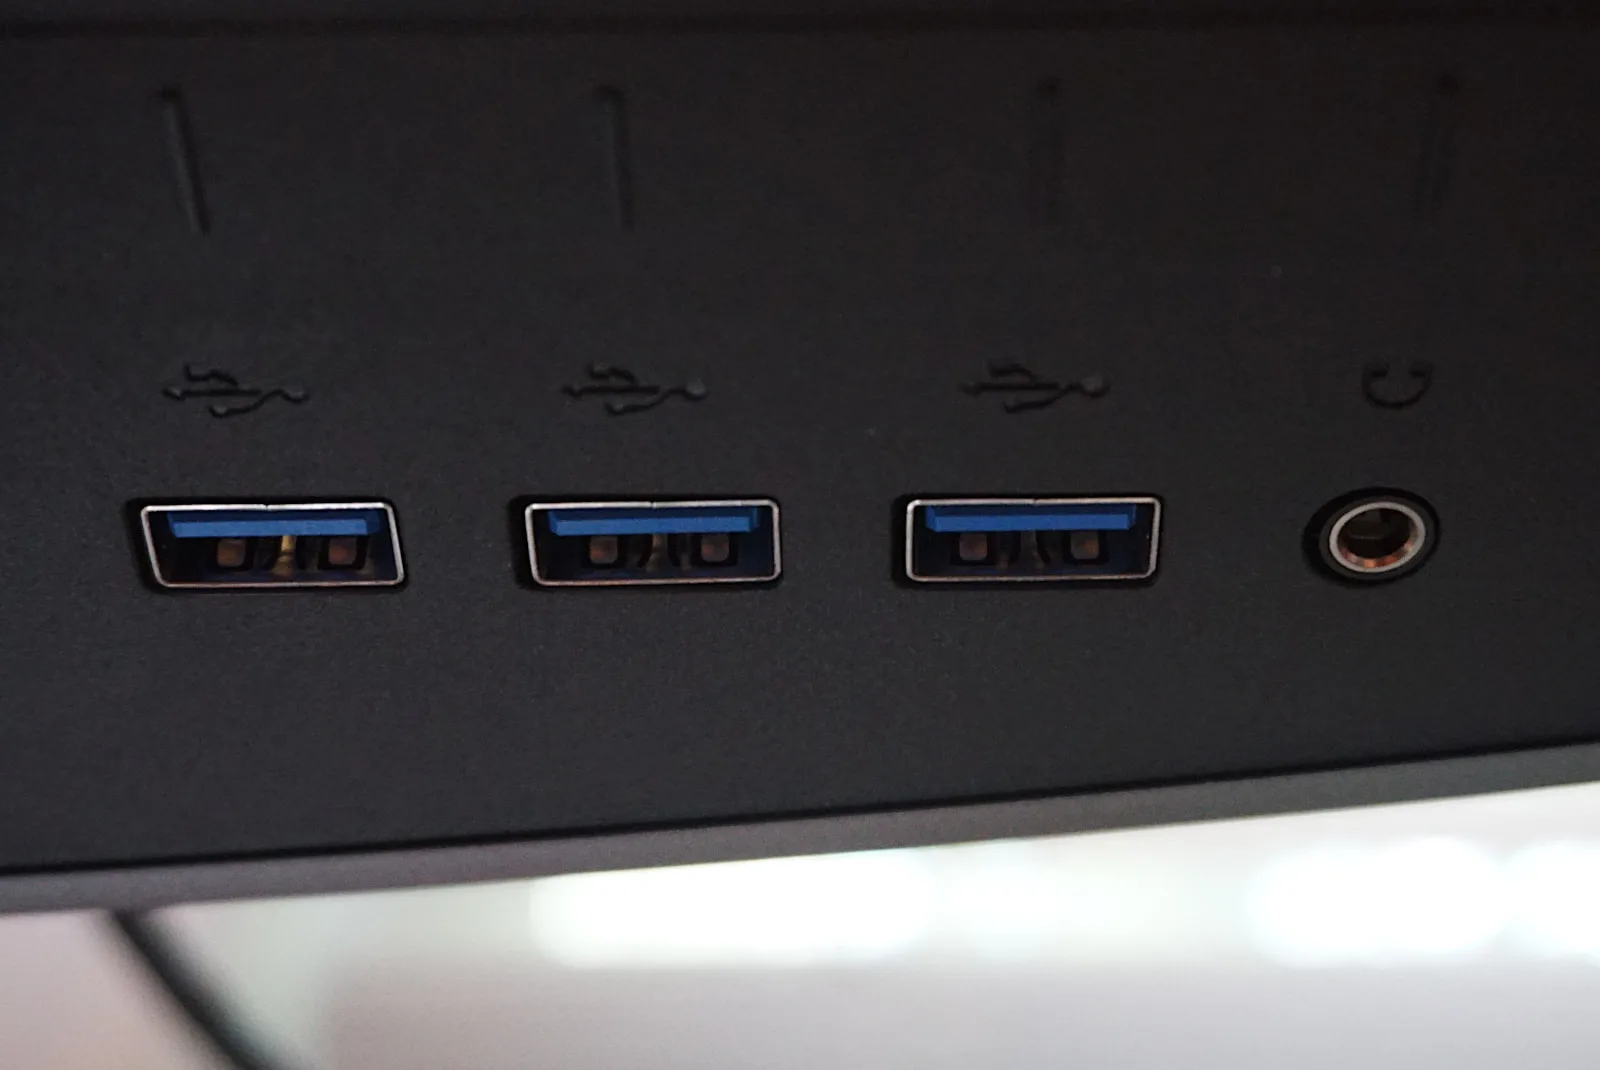
These USB ports allow you to share one set of peripherals between two connected devices. Kevin Parrish | HighSpeedInternet.com
The RD280U is packed with features, three of which I list below. Some other callouts include the keyboard/video/mouse (KVM) switch, proximity detection, and audio presets.
Our RD280U scoring breakdown
| Category | Score* | Summary |
| Performance | 4 | Displays razor-sharp fonts and brilliant colors. |
| Features | 5 | Packs eye-care tools, peripheral switching, and more. |
| Design | 5 | Includes built-in speakers, bias lighting, and many ports. |
| Setup | 4 | Requires some extra care while attaching the stand and base. |
| Ease of use | 4 | Provides free desktop software for accessing additional features. |
* out of 5 points
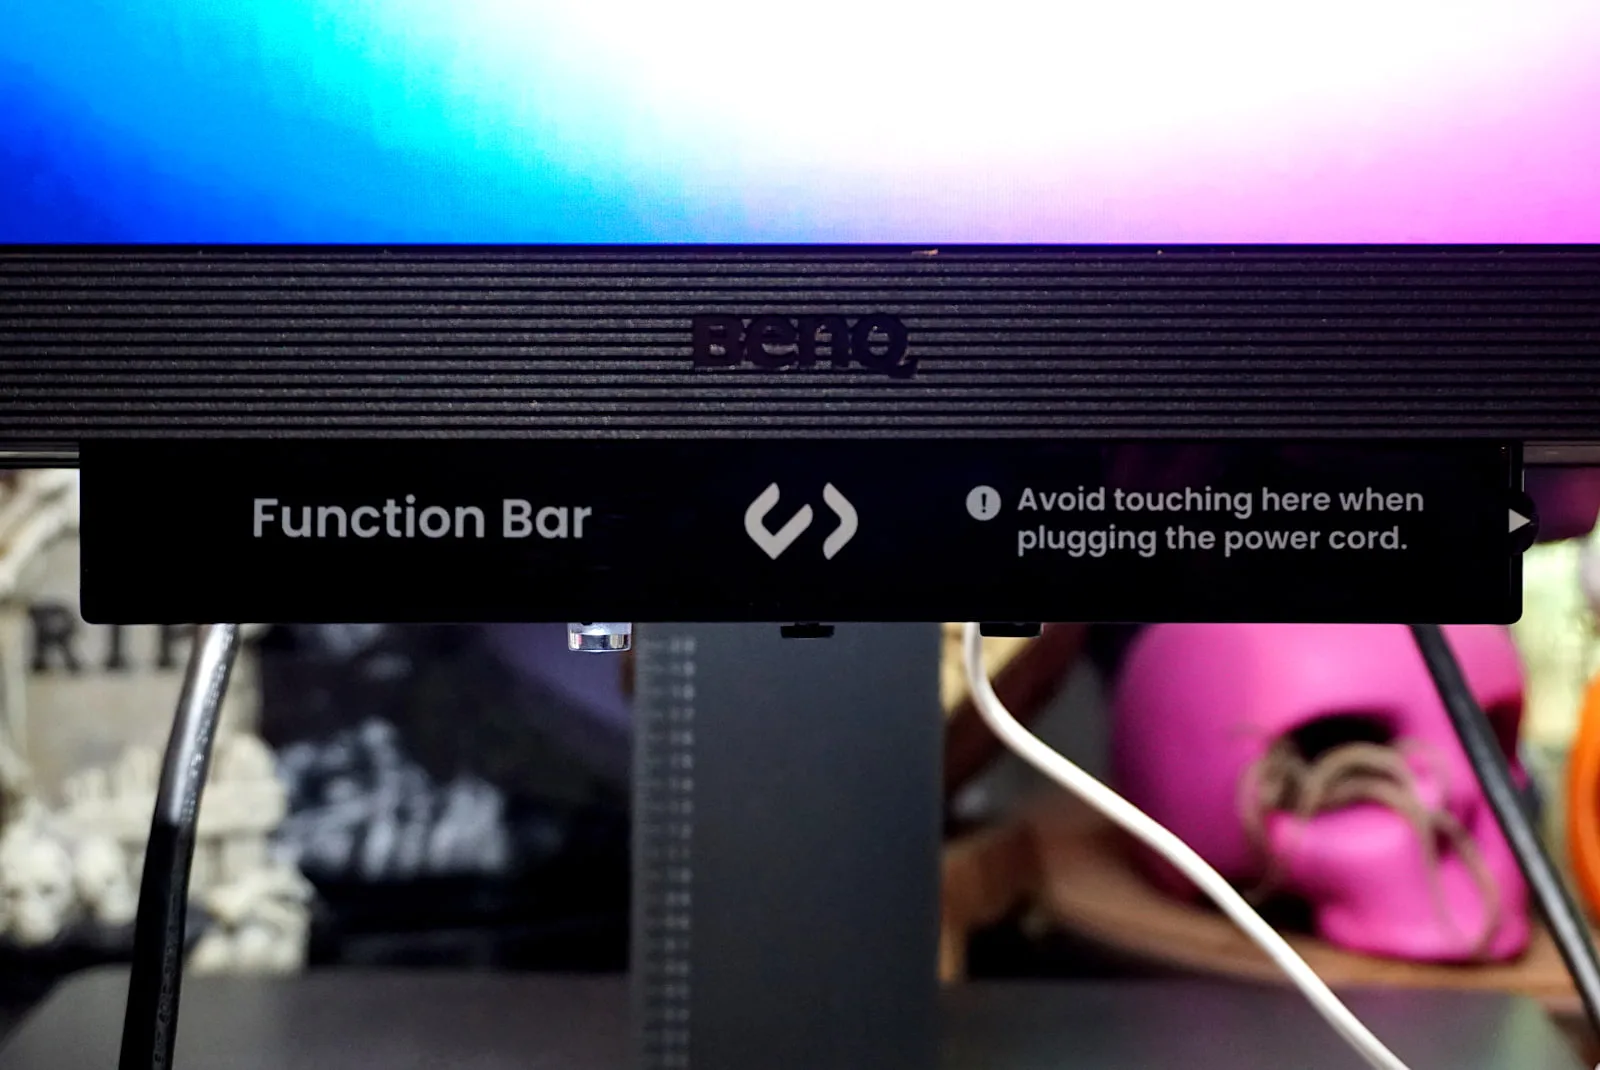
The RD280U’s Function Bar allows you to change the color mode with a quick touch. Kevin Parrish | HighSpeedInternet.com
Performance |
4 |
Ranking the quality of a monitor’s performance is mostly subjective, with a bit of benchmarking thrown in. In my tests, I recorded a max brightness of 330 nits with HDR disabled, which is average. It’s plenty bright, honestly, and doesn’t wash out the colors, which is what you want. The brightness uniformity across the screen was a little surprising, with the least brightest spot in the bottom right corner—although you really can’t tell.
But make no mistake: The RD280U presents rich colors and razor-sharp text—and that’s the subjective part of evaluating performance. It renders far better visuals than the two screens I use daily for work (sorry, boss), and now I’m a little spoiled and reluctant to give it back. The matte finish does an excellent job reducing (or eliminating, in my case) glare caused by ambient and overhead lighting.
So, is it ideal for coders? Yes. The fonts are crisp when I set the monitor to 4K and a sharpness setting of five or higher. There’s a slight blur when the setting is four or below, but you have to push your eyes against the screen to see it. Setting the monitor to 1080p obviously doesn’t produce the same results, but the fonts are pretty crisp when you set the sharpness to maximum.
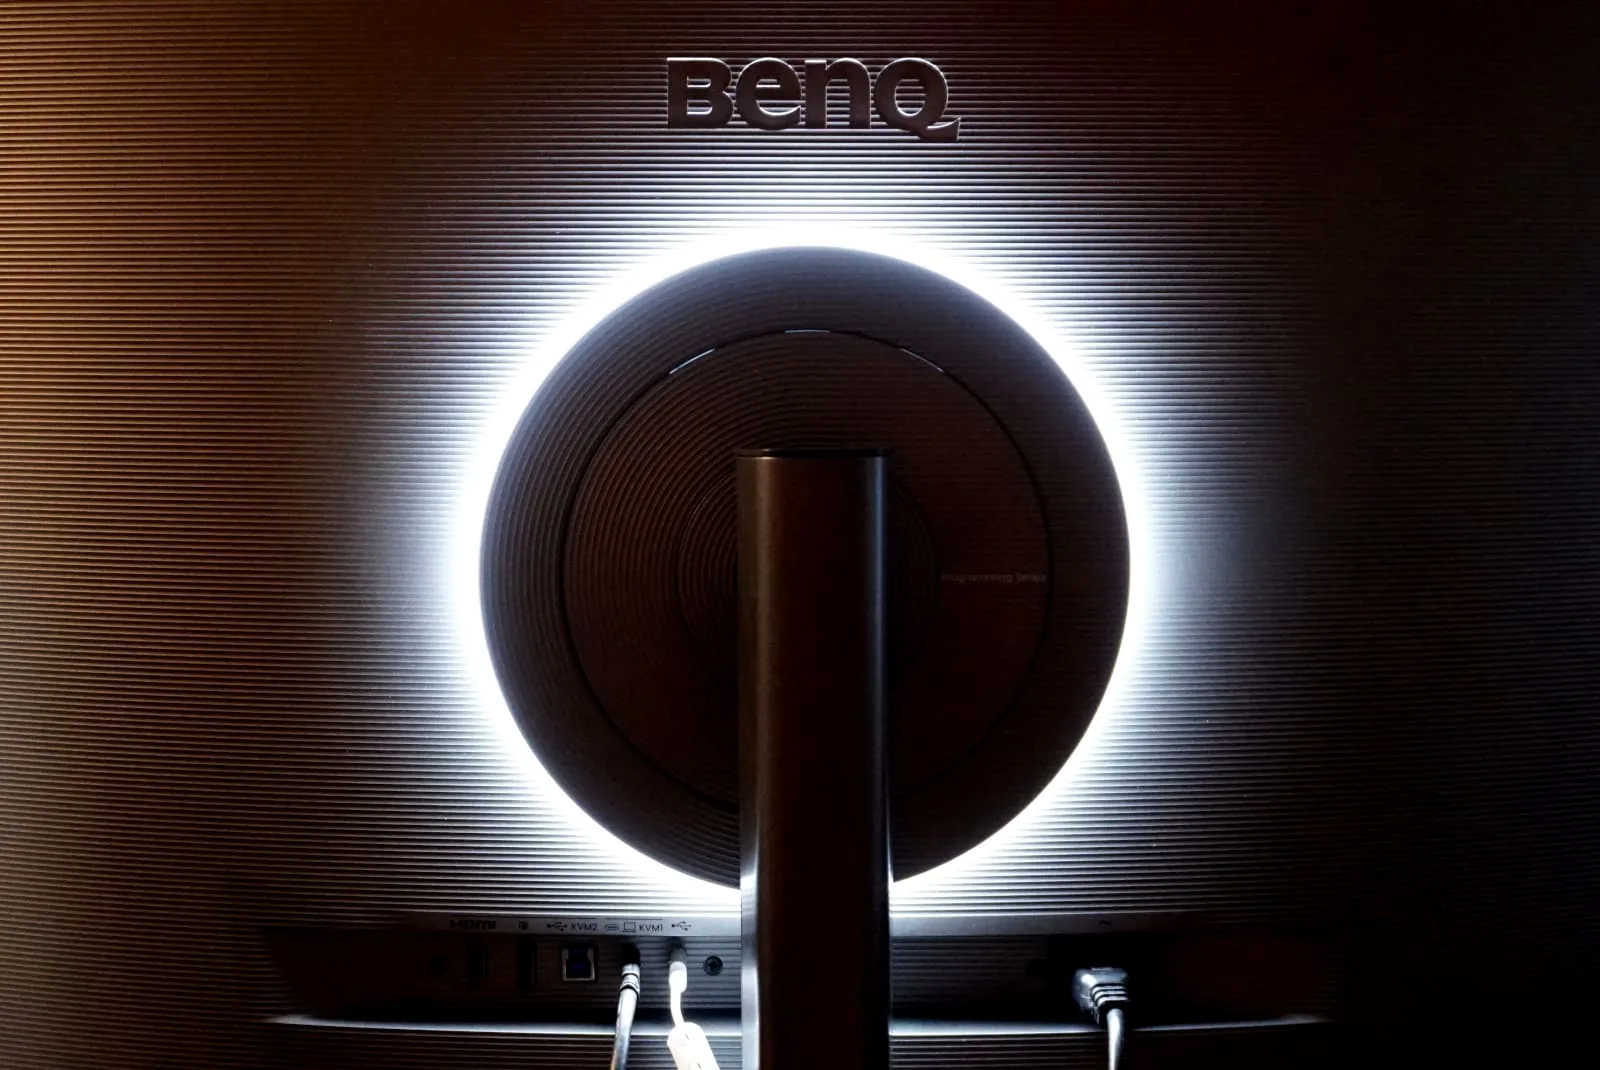
The RD280U’s built-in bias lighting can be set to 270 or 360 degrees. Kevin Parrish | HighSpeedInternet.com
Features |
5 |
The Application Color Mode is nifty, but you need BenQ’s Display Pilot 2 software to use it. This feature allows you to assign one of the eight color modes to any application installed on your computer, like pairing Cinema with a specific browser you use to watch Netflix.
Desktop Partition also requires BenQ’s software and is separate from the partition features in Windows and macOS. Simply select the tile on the Display Pilot 2 widget, enable the feature, select the layout, and then drag your application into the desired zone. However, it doesn’t support two inputs on one screen.
Overall, there’s a lot more going on than just these two callouts. Circadian Mode changes the color temperature throughout the day. The Eye Reminders uses a proximity detector to monitor your time in front of the monitor and suggest breaks. EcoPrivacy dims the screen when you walk away. You definitely get what you pay for with the RD280U.
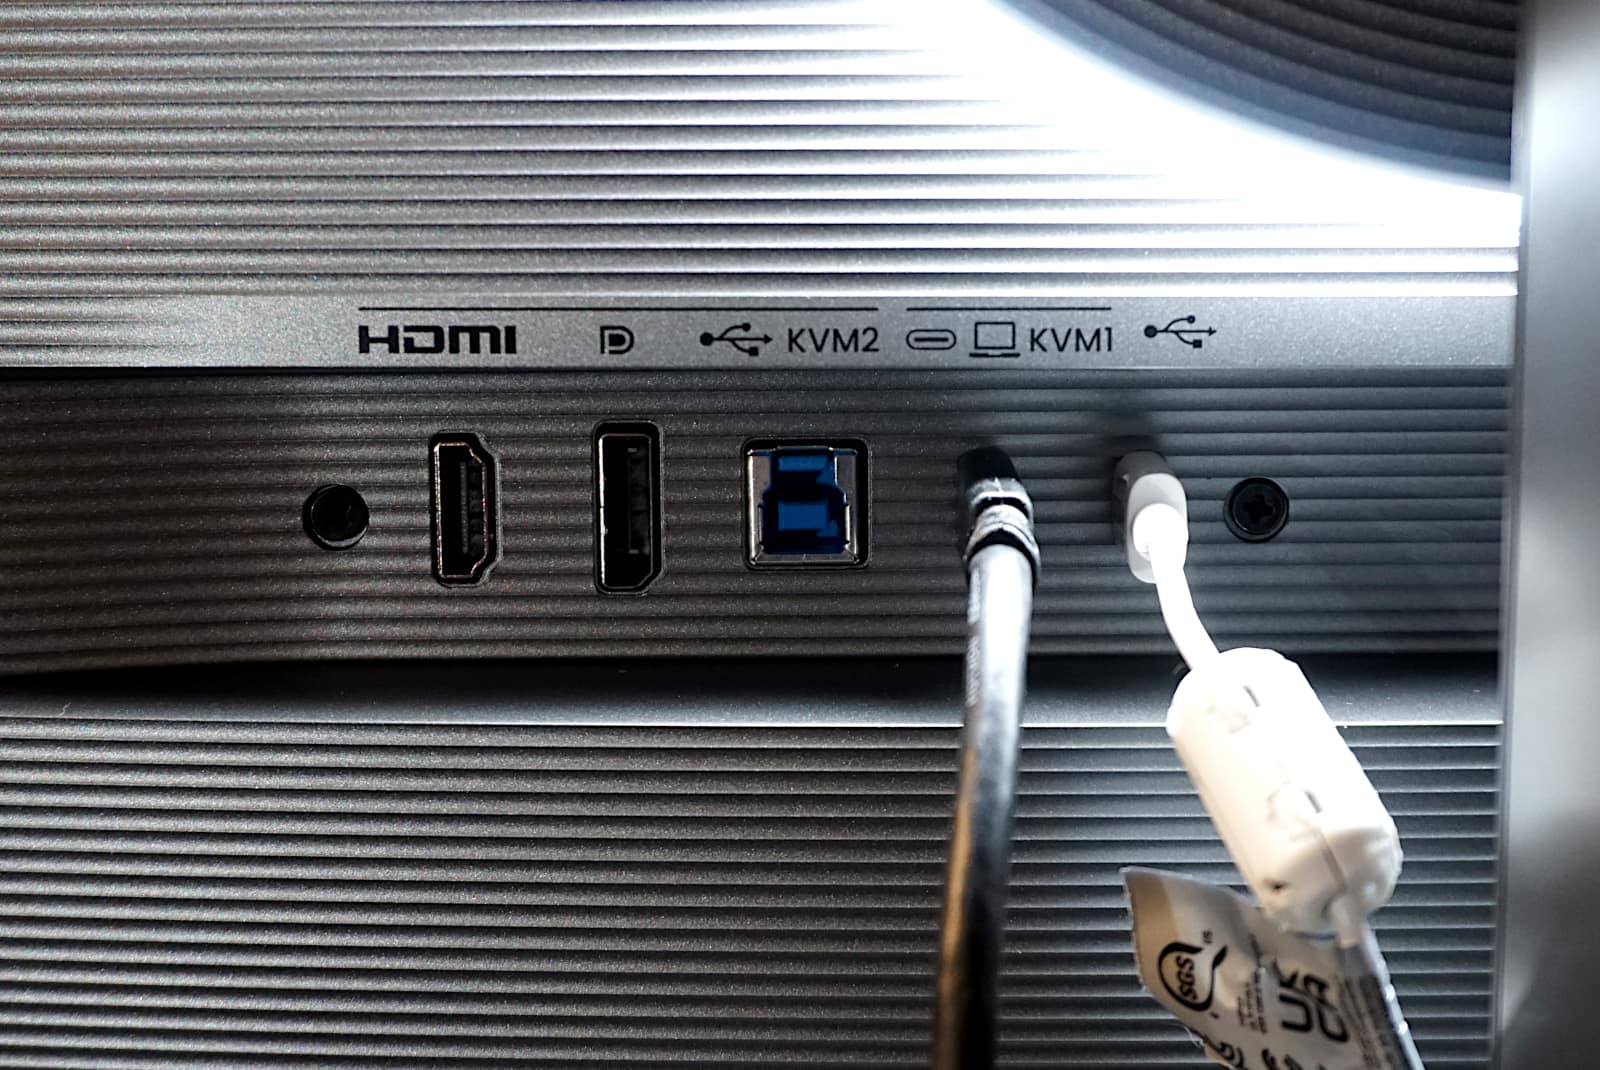
You can share one mouse and keyboard with two connected devices. Kevin Parrish | HighSpeedInternet.com
Design |
5 |
The RD280 supports two video inputs:
- One using the powered USB-C port (think MacBook)
- One using the more traditional HDMI/DisplayPort and USB-B connection (think desktop)
You switch between the two by accessing the on-screen display (OSD) and selecting USB-C, HDMI, or DisplayPort, depending on the source. The built-in KVM (keyboard video mouse) switch eliminates the need for two sets of peripherals by switching the keyboard and mouse you have connected to the monitor between the two input devices.
The MoonHalo bias lighting is good to have, even if you don’t work in a dark office, as it reduces eye fatigue and increases the contrast. You can adjust the lighting using the five-way controller under the display to set the ring’s total illuminated circumference (270 or 360 degrees), color temperature, and brightness. Be sure to toggle Non-stop Mode to “off” if you’d rather not have it lighting up your area when the monitor powers down.
I’ll also call out how the RD280U allows you to daisy chain up to four displays, depending on the model and resolution. I lay out all the details in the FAQ. Honestly, there are a lot of good things to say about the overall design, but we need to keep the word count low.
Setup |
4 |
The RD280U is not hard to assemble; it’s just bulky and heavy. You need to grab a blanket, spread it out on a table, and lay the monitor face-down on the blanket to attach the stand. After that, connect the base, and you’re good to go.
There are plenty of ports to use, but as I described in the Design section, one set is for a computing device that supports HDMI or DisplayPort video output, while one powered USB-C port is for a laptop. The USB-C port on the far right is for daisy-chaining other monitors. The stand has a clip on the back for cable management.
Finally, you’re not required to install the Display Pilot 2 software, but you’re missing out on some features if you don’t.
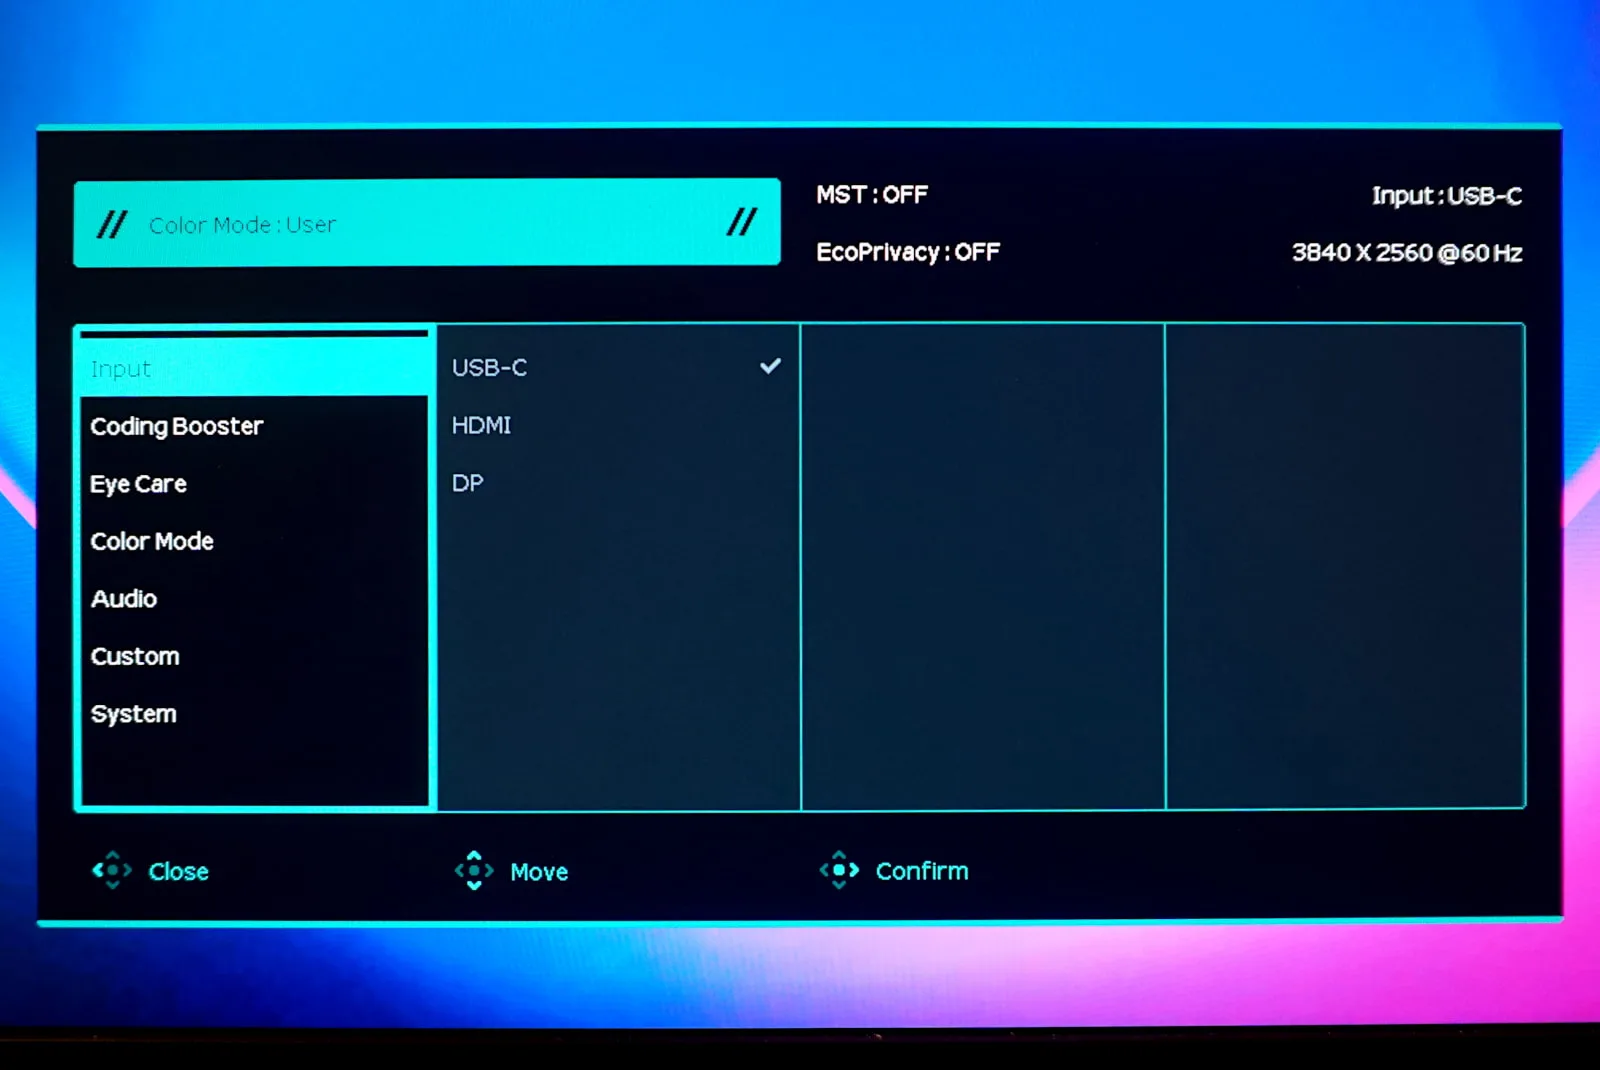
Use the RD280U’s 5-way controller to navigate the on-screen display. Kevin Parrish | HighSpeedInternet.com
Ease of use |
4 |
The OSD is pretty straightforward: Push the five-way controller forward, back, left, and right to change the settings. I noticed a slight pause when I moved the selector down the main category list and landed on Color Mode—I’m not sure if this is on purpose or if something is going on in the firmware. It was a little annoying when I wanted to adjust the sound or customize the Quick Menu and Function Key.
You can use the five-way controller to access the Quick Menu and change the MoonHalo settings, but that’s it. You can customize the Function Key if you don’t need to change inputs, like switching it to Color Mode. But whatever you set also requires the five-way controller for making selections.
The Function Bar is similar to the Function Key. However, instead of pressing a button, the interface is touch-sensitive. It’s set to the coding color modes by default, so just swipe a finger left or right to change coding modes: Dark Theme, Light Theme, and User.
Finally, the Display Pilot 2 software is okay. On Windows, the software parks in the System Tray. Click on the icon to access the widget, and right-click to open the settings panel. You can select the tools you want to use on the widget and toggle on/off the Application Color Mode. The widget isn’t sticky, so you have to click on the system tray icon to bring it back.
Additional costs and fees
There are no additional costs or fees unless you want to connect your computer to the monitor using a DisplayPort cable.
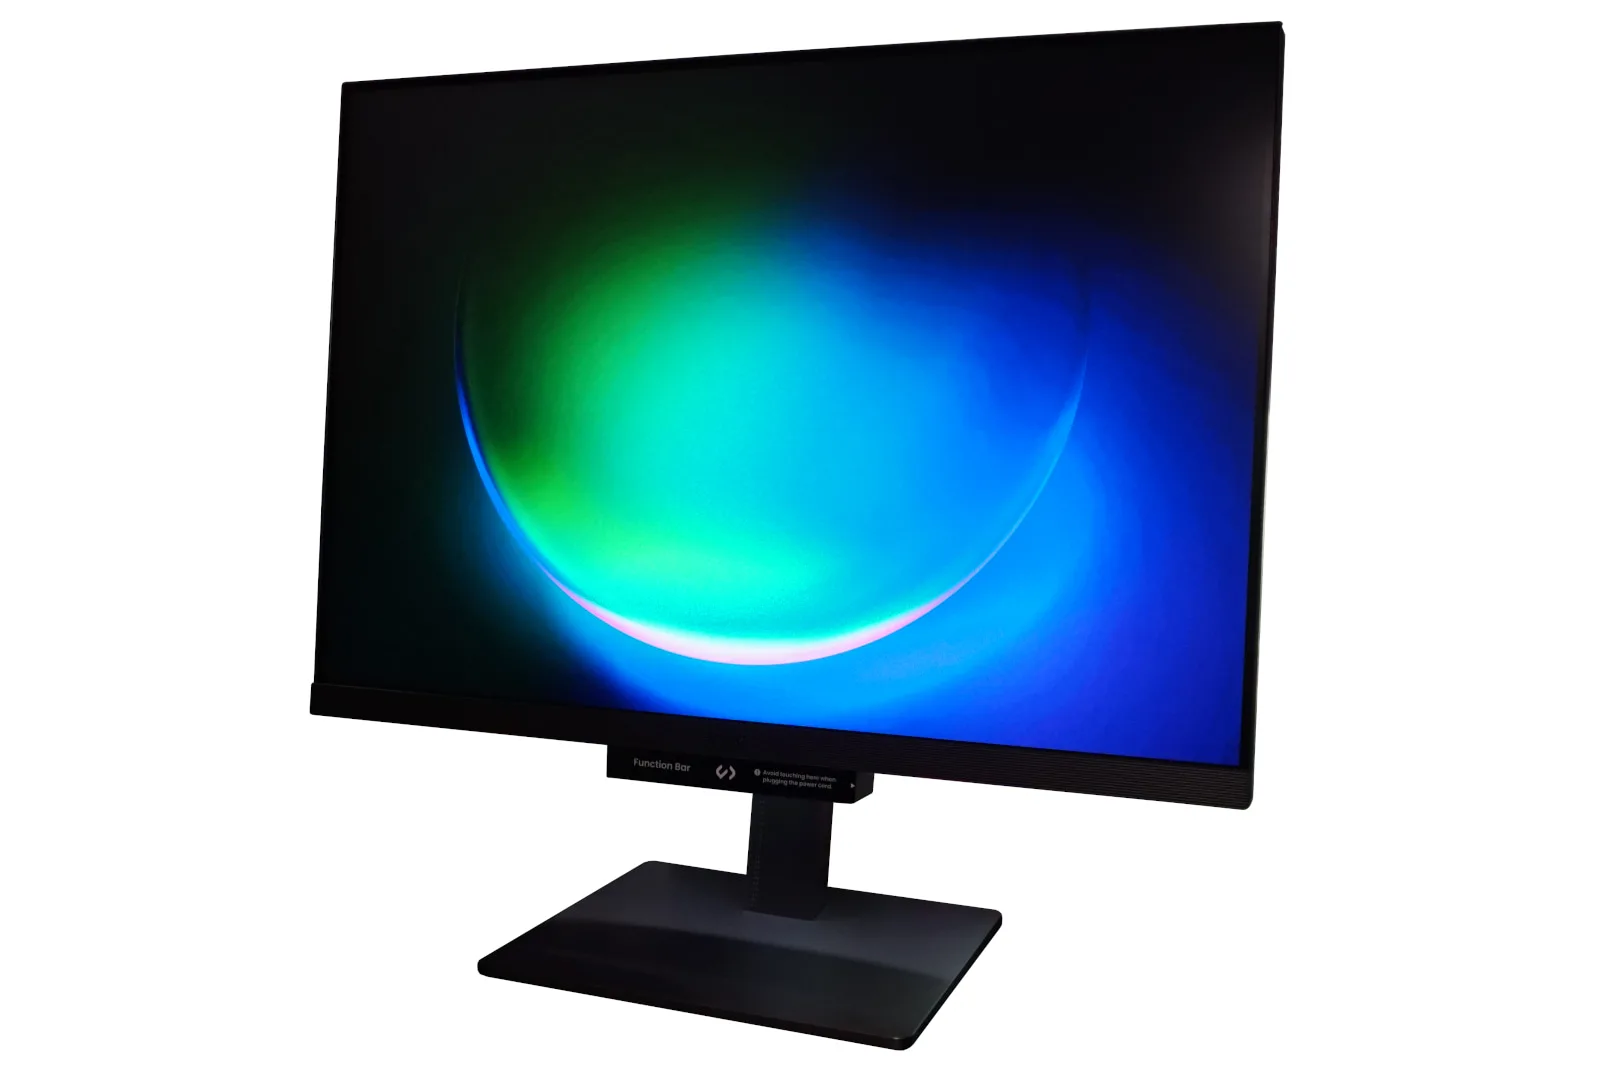
The RD280U is good to have, but PC gamers may be better off with a BenQ’s MOBIUZ monitor. Kevin Parrish | HighSpeedInternet.com
Our BenQ RD280U review: The verdict
It’s hard not to be dazzled by the RD280U after working on a couple of 1080p monitors for years. It’s like getting a new pair of prescription glasses: I can finally see.
But the saying “you get what you pay for” really does apply here. The RD280U isn’t cheap, but there’s a lot of bang for your buck that makes it a worthwhile investment. Want a second display that also powers your MacBook? The RD280U has your back. I’m especially keen on the bias lighting and the nifty touch panel on the front.
Overall, I tried to find something to complain about, and there are a few minor gripes here and there, but you can’t go wrong with the RD280U. It’s a fantastic monitor anyone will enjoy, not just programmers.
BenQ RD280U FAQs
What are the monitor's color modes?
How many monitors can you daisy-chain?
What is Coding Booster?
How do you share one mouse and keyboard using the RD280U?
Methodology
Monitor evaluation is mostly subjective. We start the process upon opening the box. How easy is it to assemble, connect, and customize? Setup can be a long or short process, depending on the monitor.
For performance, the only testing we do is through the Datacolor Spyder X2 calibration tool. We use it to gather data about the monitor and compare the results to the advertised specifications. The tests include color range, color accuracy, brightness levels, and uniformity.
Ease of use also weighs heavily in our evaluation. There’s nothing more annoying than having to find the buttons you need and dig around a clunky interface. Monitors should be relatively hands-free.
RD280U benchmarks
Gamut test
| sRGB | AdobeRGB | P3 |
|---|---|---|
| 100% | 84% | 91% |
Tone response test
| Gamma range |
|---|
| 1.8–2.6 |
Brightness and contrast test
| Brightness level | Brightness* | Contrast |
|---|---|---|
| 0% | 54.4 nits | 820:1 |
| 100% | 329.5 nits | 1150:1 |
* Higher is better
Brightness uniformity
| Brightness level | Brightest quadrant* | Darkest quadrant* |
|---|---|---|
| 50% | Top middle (0.0) | Bottom right (2.6) |
| 100% | Top middle (0.0) | Bottom right (4.3) |
* Using a scale off 0 to 10. Lower is better
Color accuracy
| Minimum | Maximum | Average* |
|---|---|---|
| 0.07 | 1.86 | 0.49 |
* Lower is better
Disclaimers
Amazon
Amazon.com Prices as of 8/26/24 17:35 MST. Product prices and availability are accurate as of the date/time indicated and are subject to change. Any price and availability information displayed on Amazon.com at the time of purchase will apply to the purchase of this product. Highspeedinternet.com utilizes paid Amazon links.
CERTAIN CONTENT THAT APPEARS ON THIS SITE COMES FROM AMAZON. THIS CONTENT IS PROVIDED ‘AS IS’ AND IS SUBJECT TO CHANGE OR REMOVAL AT ANY TIME.
Author - Kevin Parrish
Kevin Parrish has more than a decade of experience working as a writer, editor, and product tester. He began writing about computer hardware and soon branched out to other devices and services such as networking equipment, phones and tablets, game consoles, and other internet-connected devices. His work has appeared in Tom’s Hardware, Tom's Guide, Maximum PC, Digital Trends, Android Authority, How-To Geek, Lifewire, and others. At HighSpeedInternet.com, he focuses on network equipment testing and review.
Editor - Jessica Brooksby
Jessica loves bringing her passion for the written word and her love of tech into one space at HighSpeedInternet.com. She works with the team’s writers to revise strong, user-focused content so every reader can find the tech that works for them. Jessica has a bachelor’s degree in English from Utah Valley University and seven years of creative and editorial experience. Outside of work, she spends her time gaming, reading, painting, and buying an excessive amount of Legend of Zelda merchandise.


